A big leap forward.. in fact two..

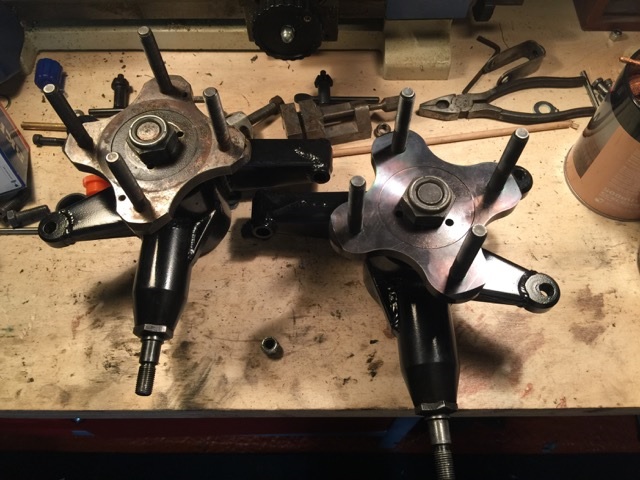
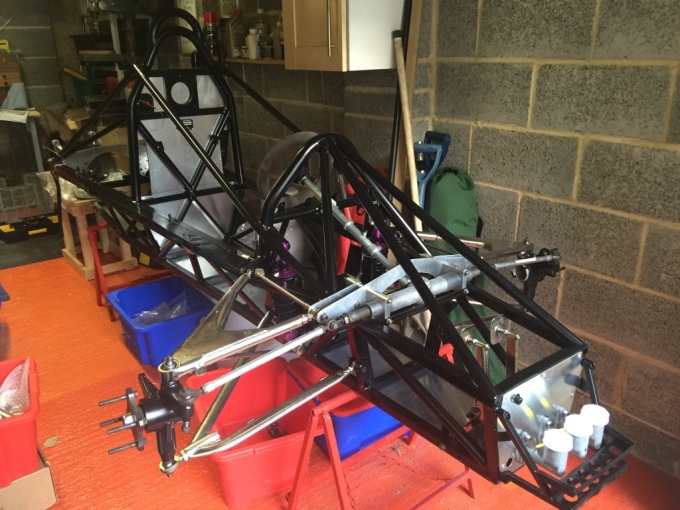
Having assembled the front uprights and picked up the newly painted, and’ bearinged’, front wishbones and pullrods some time ago, it was high time to trial assemble the front end.  Trial assembly made sense on two levels.  The first is that I want to replace all the bolts and am yet to purchase them, and secondly, it is quite likely that it will take a few goes to get it all together properly.  There isn’t much to say about the assembly process. All pretty straight forward.  And quite impressive when done. Its starting to look look like a racing car at last.

thumb_IMG_1377_1024

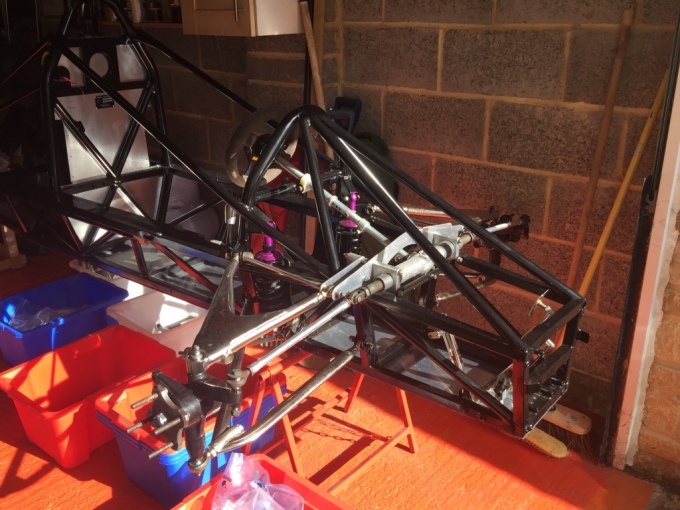
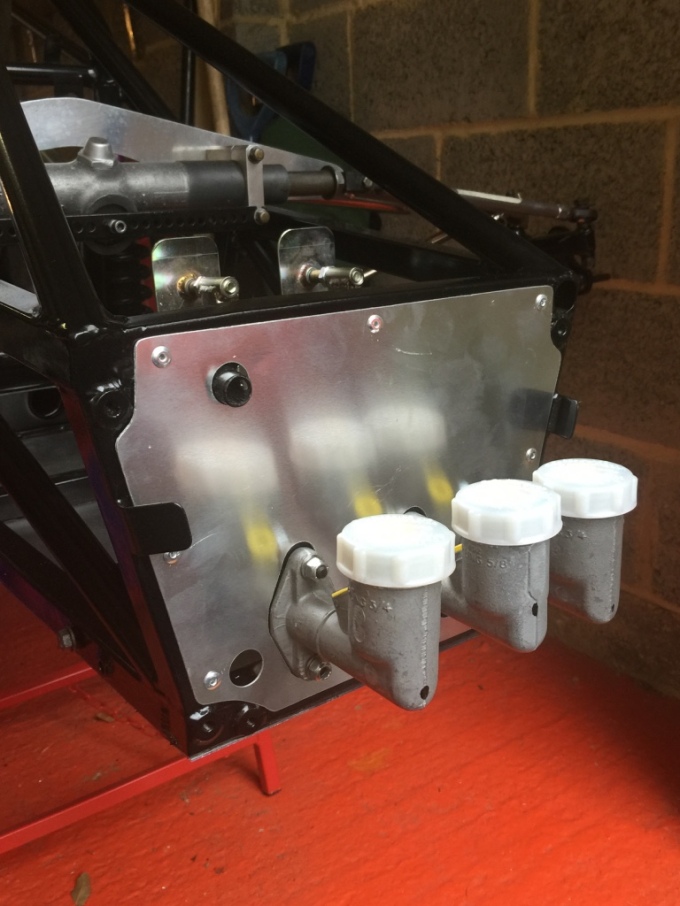
With the front suspension all in place (OK its not all in place – I’m not connecting the anti-roll bar until the final go at it all) the next job was to add the front panel.  Most of the holes in the chassis have been filled – but those in the front cross tubes have not. And this meant that the panel had to be fitted using the original holes in the chassis members.  Needless to say I messed up the hole positions in the panel I had bought; meaning that I had to make a new one from scratch.  This process was largely a repeat of the firewall make, and therefore, although cutting the holes for the master cylinder complicated the job, it all went very well; including pop-riveting it in place.

thumb_IMG_1384_1024

thumb_IMG_1387_1024

Last week I also went to pick up the gearbox from Mark Bailey, after its extensive rebuild.  The box looks superb, so bolting it in to the rear of the chassis is the next job.  However a search of the relevant plastic bins, and a look a the pre-breakdown photo’s, showed that 2 support brackets needed to be added at the same time as the rear ally plate and connector casting.  And these needed re-plating.  This afternoon’s work revolved around boxing them up.. Apparently I can expect to seem them again in about 4 weeks.  Plenty of time, then to clean the aluminium parts, and to make a start on rebuilding the rear uprights.


Lugging half a tank of fuel up the hill at Loton and replacing the upright bearings.

After the Midland round at Gurston I spent a frantic 20 minutes driving round Salisbury looking for petrol.  Having found a garage (along with a few other roadgoing competitors) I decided to fill the tank.  Gurston to Witney then Witney to Loton was pretty much guaranteed to leave the tank almost empty as I drove into the paddock for the HSA round.  The mods (for the record exhaust, cam and airbox) seem to have increased the mpg not reduced it; as I drove along the M54, and then the A5, it was increasingly apparent that I’d have over 1/2 a tank when I arrived.  It seemed barely credible. But without any way of extracting the extra fuel I was left to drag it up Loton Hill 4 times. (I know the answer – I’ve got a jerry can and a siphon is on the way from Demon-Tweeks.  I’m also planning the removal of the rear wiper motor and mechanism and some other bits and pieces will get the chop in the name of lightness.)

My first practice run was a 73.75 and my second was a PB of 72.71. The first official run was another PB – 72.32, but I missed a gear (sound familiar) on run 2 and only achieved a 73.5.  But lots to be pleased about; my new PB was 1.32 seconds faster than last year and 6/10s faster than May.  Its all heading in the right direction, even though the points I scored left me behind Geoff Lancaster still!!  The picture below is from the May meeting actually, and was stolen from a Flickr account called “Its Mr Pants”…

May 2016 Loton

Back in the workshop it was time to rebuild the uprights.  I’d repainted the stripped fabrications using smooth hamerite.  Given that it was a spraycan I used lots and lots of light coats, leaving at least 8 hours in between.  The results were pretty gratifying.

Pressing the bearings back into the housings was pretty straightforwards – lots of copperslip as specified by Simon at URS.  My first attempt at pressing a hub in was what could be described as a total failure.  Somehow the hub didn’t seem to want to press in, and when I released the press the hub was about 15 degrees off axis.  Removing it destroyed the new bearing.  Time to order another new one.  Meanwhile more attention to alignment had the second hub in easily.  The moral of the story is obvious.

Removing the damaged bearing from the upright was very easy, almost certainly courtesy of the industrial quantities of copper grease used. The new bearing was easily assembled into the upright..

completed_uprights

The only thing to do now is to torque up the central nut and bolt assembly. Sadly the new nylocs I’d sourced were too high for the nylon section to engage on the thread.  So a new set are being machined to suit.  I also managed to fit the pedals…  By the next blog I should have the new master cylinders in, and the front suspension at least trial fitted.

pedals